


本文章同時發佈於:
- Medium
文章為自己的經驗與夥伴整理的內容,設計沒有標準答案,如有可以改進的地方,請告訴我,我會盡我所能的修改,謝謝大家~
大家好。今天要介紹 Istio
的
VirtualService、Gateway,兩者搭配可以達到
K8s 的Ingress的效果,並且有著 Istio 更強大的功能。而這篇文章會以實作為介紹,實際原理將在之後介紹,
實作
以下的實作範例都在Code-Example中,
在
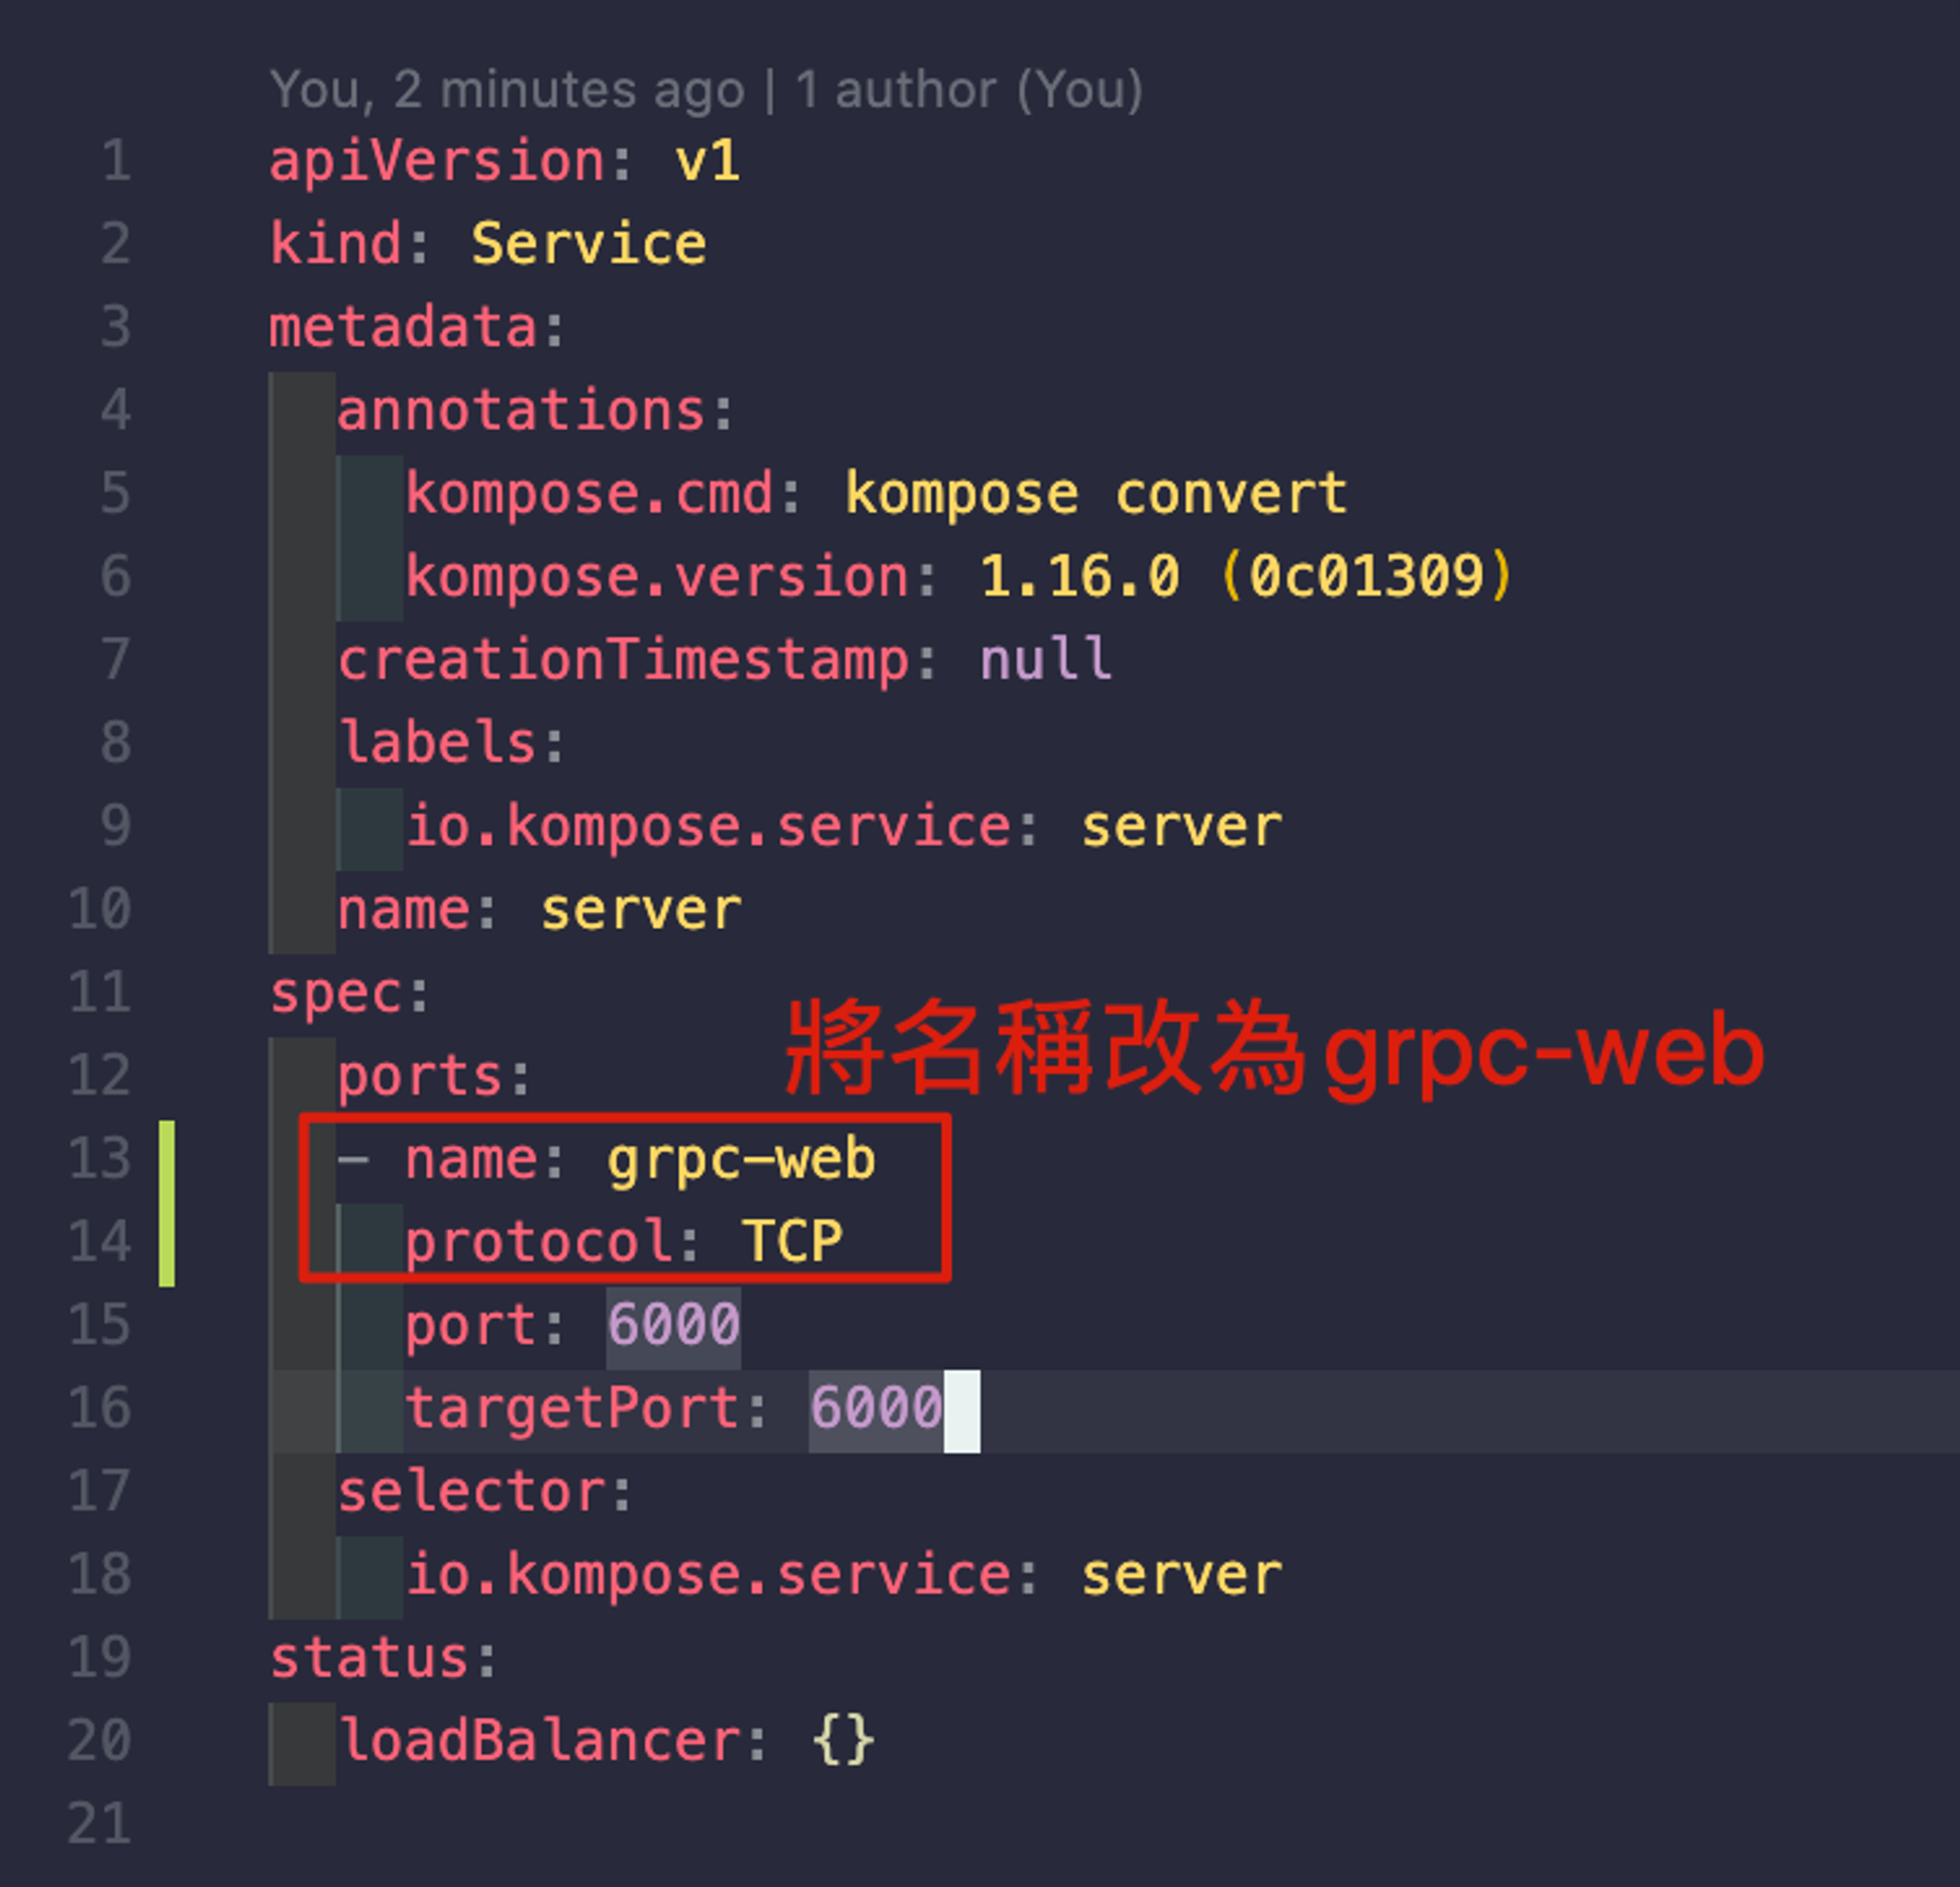
helm-digimon/templates/server-service.yaml中,我們須將
ports
的name做修改為grpc-web,Istio在看到此name後,就會調整envoy
proxy使client網頁端的grpc-web請求可成功與server溝通。詳細API在此
新增
VirtualService、Gateway兩個元件至DAY23/helm-digimon/templates/gateway.yamlapiVersion: networking.istio.io/v1alpha3kind: Gatewaymetadata: name: gatewayspec: selector: istio: ingressgateway servers: - port: number: 80 name: http protocol: HTTP hosts: - "*.backend.com"---apiVersion: networking.istio.io/v1alpha3kind: VirtualServicemetadata: name: virtual-servicespec: hosts: - "api.backend.com" gateways: - gateway http: - match: - uri: prefix: /digimon.Digimon route: - destination: port: number: 6000 host: server corsPolicy: allowOrigins: - exact: "http://web.backend.com" allowMethods: - POST - GET - OPTIONS - PUT - DELETE allowHeaders: - grpc-timeout - content-type - keep-alive - user-agent - cache-control - content-type - content-transfer-encoding - x-accept-content-transfer-encoding - x-accept-response-streaming - x-user-agent - x-grpc-web maxAge: 1728s exposeHeaders: - grpc-status - grpc-message allowCredentials: true---apiVersion: networking.istio.io/v1alpha3kind: VirtualServicemetadata: name: webspec: hosts: - "web.backend.com" gateways: - gateway http: - match: - uri: prefix: / rewrite: uri: / route: - destination: port: number: 8060 host: web
DAY23/helm-digimon/templates/gateway.yaml有一個Gateway、一個web的VirtualService、一個server的VirtualService,外部的流量會如下導至正確的pods,
Istio Gateway元件 --> Istio VirtualService元件 --> K8s Service元件 --> K8s Pods元件
將 K8s run 起來,
$ minikube start --kubernetes-version v1.16.0
安裝Istio系統至K8s,並啟用envoy sidecar,
$ istioctl install --set profile=demo
$ kubectl label namespace default istio-injection=enabled
啟動所有K8s元件
$ cd DAY23/helm-digimon
$ helm install . --generate-name
Istio Gateway設計的外部流量導向如下:
外部Load Balancer --> Istio Gateway元件
由於實作是採用minikube,我們必須模擬外部Load Balancer出來,
$ minikube tunnel
模擬完畢後透過
minikube ip或的minikube的外部ip,並透過$ open /etc/hosts將URL導至此ip,如果minikube
ip是127.0.0.1的話修改方式如下:

都完成後打開
web.backend.com,web
client已經成功與server溝通,太好了。

結論
你可能會想
為什麼要特別設計一個VirtualService元件,不直接用K8s Service元件呢?,為什麼要分那麼多層元件呢?,以下問題都會在下篇文章做探討,謝謝你的閱讀~